RoboRIO Web Dashboard
The roboRIO web dashboard is a webpage built into the roboRIO that can be used for checking status and updating settings of the roboRIO.
Unlike the 2015-2018 roboRIO web dashboard, the 2019 web dashboard does not use SilverLight. Users may encounter issues using IE (compatibility) or Edge (mDNS site access). Alternate browsers such as Google Chrome or Mozilla Firefox are recommended for the best experience.
Note: The roboRIO web dashboard was been re-written for 2019. All CAN configuration functionality has been removed. Configuration of CAN devices should be done with software provided by the device vendor. For CTRE devices previously serviced using the webdashboard, the appropriate software is CTRE Phoenix Tuner.
Opening the WebDash
To open the web dashboard, open a web browser and enter the address of the roboRIO into the address bar (172.22.11.2 for USB, or “roboRIO-####-FRC.local where #### is your team number, with no leading zeroes, for either interface). See this document for more details about mDNS and roboRIO networking: RoboRIO Networking
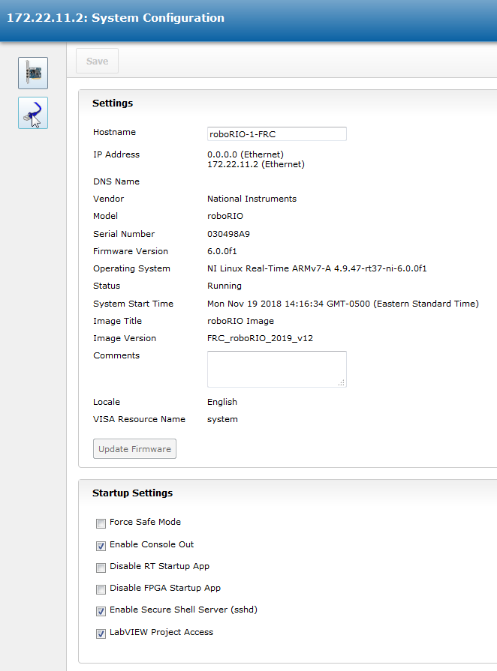
System Configuration Tab
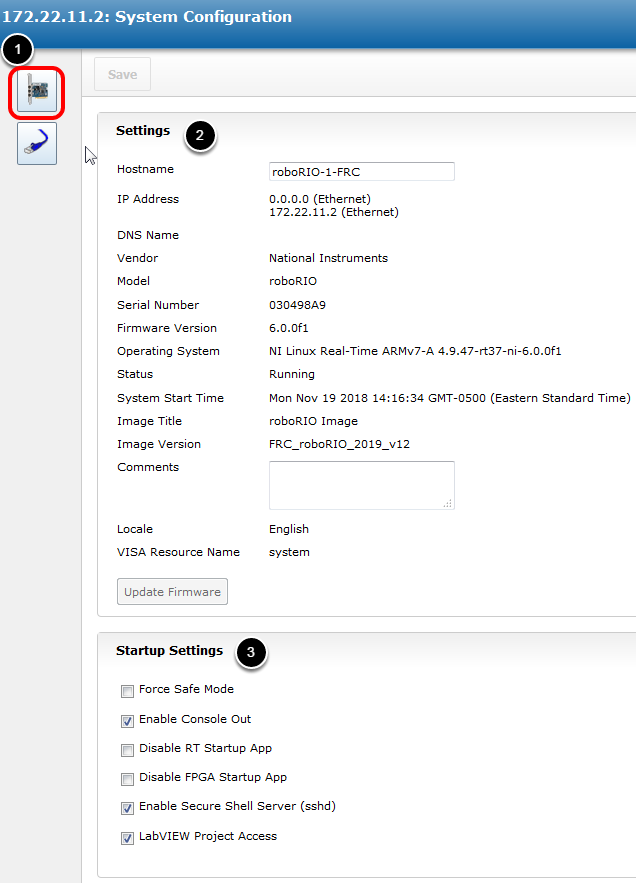
The home screen of the web dashboard is the System Configuration tab which has 5 main sections:
- Navigation Bar - This section allows you to navigate to different sections of the web dashboard. The different pages accessible through this navigation bar are discussed below.
- System Settings - This section contains information about the System Settings. The Hostname field should not be modified manually, instead use the roboRIO Imaging tool to set the Hostname based on your team number. This section contains information such as the device IP, firmware version and image version.
- Startup Settings - This section contains Startup settings for the roboRIO. These are described in the sub-step below
- System Resources (not pictured) - This section provides a snapshot of system resources such as memory and CPU load.
Startup Settings
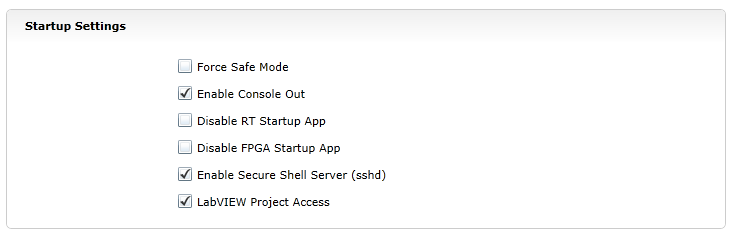
- Force Safe Mode - Forces the controller into Safe Mode. This can be used with troubleshooting imaging issues, but it is recommended to use the Reset button on the roboRIO to put the device into Safe Mode instead (with power already applied, hold the rest button for 5 seconds). Default is unchecked.
- Enable Console Out - This enables the on-board RS232 port to be used as a Console output. It is recommended to leave this enabled unless you are using this port to talk to a serial device (note that this port uses RS232 levels and and should not be connected to many microcontrollers which use TTL levels). Default is checked.
- Disable RT Startup App - Checking this box disables code from running at startup. This may be used for troubleshooting if you find the roboRIO is unresponsive to new program download. Default is unchecked
- Disable FPGA Startup App - This box should not be checked.
- Enable Secure Shell Server (sshd) - It is recommended to leave this box checked. This setting enables SSH which is a way to remotely access a console on the roboRIO. Unchecking this box will prevent C++ and Java teams from loading code onto the roboRIO.
- LabVIEW Project Access -** It is recommended to leave this box checked.** This setting allows LabVIEW projects to access the roboRIO.
Network Configuration
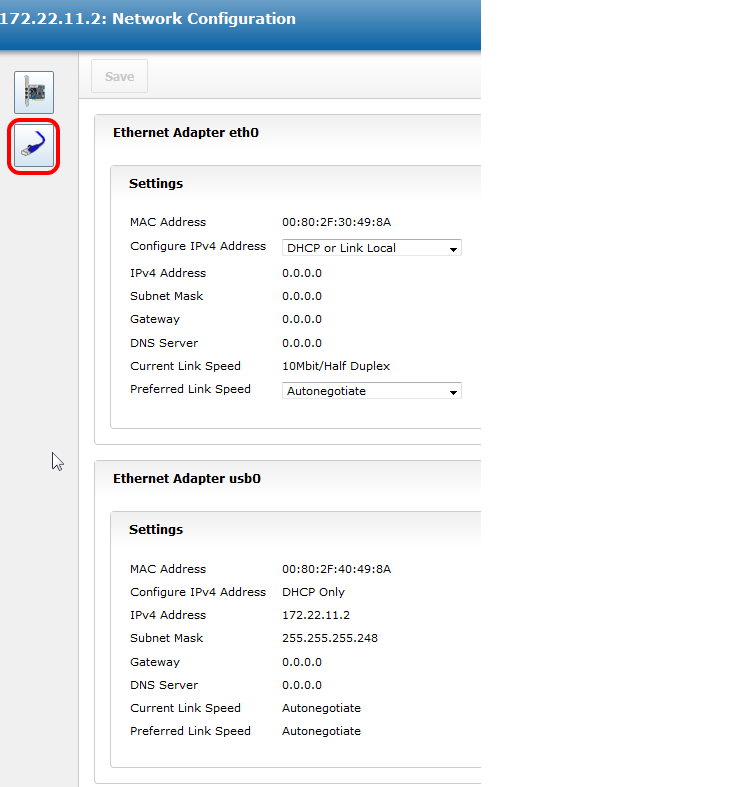
This page shows the configuration of the roboRIO’s network adapters. It is not recommended to change any settings on this page. For more information on roboRIO networking see this article: RoboRIO Networking